A few years ago I started making my own bread from scratch and now I will never go back. The homemade kind tastes so much better, is so much better for you, and is so much cheaper. It is a little extra work, but once you get the hang of it, it is not hard at all. I make bread at least once a week.
Towards the end of my pregnancy, I made it a lot more and froze a bunch so that I wouldn't have to make some for a while after I had my baby. You can freeze them for a month or two, but I wouldn't go longer than a few months or 6 months at the most as they get freezer burnt really easily and that ruins the texture.
When I first started making bread, I used the bread recipe from
pantry secrets. It is an okay recipe that is meant to be fail safe and easy. It is easy and fast, but I don't think that my recipe is any harder. Mine might be a little easier to mess up, but even when I do mess up, it still tastes good, it just doesn't look as pretty. I also like that mine has all REAL ingredients. Theirs requires Soy Lecithin and I am not sure what that is exactly, but I am sure it is processed and we are trying to avoid processed foods as much as we can. It is also hard to find and you have to buy it from them (which is convenient for them).
My recipe comes from my mom, who got it from a local bakery in CA. I have modified her recipe a bit to make 2 regular size loaves as hers makes HUGE loaves that don't fit in my bread bags. Growing up, everybody knew my mom for her bread. She would donate a few loaves for silent auction fundraisers and they would often sell for over $50 a loaf! It is really that good and you can hardly believe that you are eating whole wheat bread because it is so light, fluffy, and moist.
I was scared to make hers at first because I didn't think that I could make mine as good as hers, but come to find out it is really easy and mine taste just as good!
This bread uses 100% whole wheat flour. I grind mine myself if a wheat grinder right before I make it. Wheat flour loses its nutrient value quickly after you grind it (like within a few days) and can become rancid quickly. When you grind wheat, if you do not use it right away, be sure to store it in the freezer so that you can retain the nutrients better. You can also use whole wheat flour purchased from a store, but it won't have the nutrient value that using freshly ground wheat can have.
So on to the recipe (scroll all the way down for full recipe)
Break making is so much easier if you have a good mixer with kneading attachments. I use the 20+ year old mixer that was a hand me down from my mom after she got a Bosch. Bosch mixers are the best. Kitchen Aids will work, but their motors are not as strong and will burn out rather quickly if you make bread very often. You can also mix and knead everything by hand.
First thing I do is grind my wheat. I usually use hard white or hard red wheat. You can use either kind, just not soft wheat. I think the red has a little bit stronger of a flavor and I have heard that it can be a little harder to digest for people who are not used to eating a lot of wheat, but I have not noticed any difference.
I fill the top of my grinder with as much as it will hold. For my grinder, this makes about 4 cups and only takes a few minutes to grind. I set it aside to use later.
In the mixing bowl, I first combine 2 1/4 cups of hot water, 1/3 cup oil, 1/3 cup honey and 1 t salt. For the water, I use filtered water and then heat it in the microwave for a minute. You want it hot, but not so hot that it burns your finger if you put it in it.
I also have a trick for the honey. I take my 1 cup pyrex liquid measuring cup and first put in 1/3 cup of oil. Then I add honey until it gets up to 2/3 cup. The honey will settle towards the bottom, but there will still be a little oil between the glass and the honey. Then when you pour it out, the honey just slips right out without sticking to the glass.
Then I add 1/3 cup of gluten. The gluten is very important as this is what keeps the bread from being crumbly. When using whole wheat flour, you have to have gluten or the bread won't have good texture and will be dense. Gluten has gotten a bad rap lately, but gluten is only bad for people who are sensitive to it. For most people, it is totally fine. Just because something is gluten free, does not mean it is healthy.
Then you add 1 Tablespoon of yeast. You can use dry active or instant yeast. Both will work just fine. The instant rises faster at first, but the dry active catches up and in the end they both make the bread rise in about the same amount of time.
After the yeast, I leave my mixer on, and then add about 4-5 cups of wheat flour, a cup at a time. My wheat grinder usually does about 4 1/2 cups at a time, so sometimes I supplement with a little bit of bread flour (I like the Turkey Flour from Lehi Roller Mills) if 4 1/2 isn't a enough. Do not use all-purpose flour.
The amount of flour needed will vary depending on the day (humidity, pressure, temperature, etc) which is why you add it a cup at a time. You want to keep adding until the dough pulls away from the sides and forms a clump in the middle. When I made it for these pictures I used about 4 3/4 cups. If you add too much, it will be dry, but if you don't add enough, it will be too wet and sticky to work with. If you end up adding to much, just a little bit more water.
After adding the flour, put on the lid, turn up the speed and have it knead the bread for 5 minutes.
Meanwhile I usually put the ingredients away, wash my measuring cups/spoons, and grease my pans and a small section of the counter. I will also turn on the oven for just a minute, just so it is a little warm, but not hot.
After 5 minutes, turn it off and then grease up your hands really well so you can take the dough out of the bowl and put it on your counter. The dough should be pretty smooth and a little sticky so make sure you put it on the greased section of your counter. After you start kneading bread, you don't want to incorporate any more flour which is why we grease our hands and the counter instead of flouring it.
Now we are going to hand knead it just a bit to smooth it out a bit more after taking it out of the bowl. Start out with a somewhat flattened mound, then fold it in half and press. Then rotate it 90 degrees and do it again. I usually use both hands for this, but I needed one hand to take pictures with. Repeat this 4-5 times.
Now you want to split the dough in half to make the 2 loaves. I form an elongated ball and then use my thumb and middle finger to pinch the dough into two (somewhat) equal halves.
To form the loaves, I flatten it out and fold it in half like I do when kneading, but then pull the sides down a bit to form a smooth top with the seam on the bottom. I place the loaves seam side down in the pans.
My loaves weren't quite even, but that is fine. It won't matter too much. I place the pans inside the warm oven to rise. The rising time will again vary a ton. For me, it takes 20-30 minutes. If you have not made bread before or do not make bread very often, it will probably take longer. The more you make bread, the faster it will rise due to the amount of "wild" yeast that will be present in your kitchen. You want it rise until the dough forms a little dome above the rim of the pan. It will rise a bit more when you start to bake it too so don't let it rise too high or it can collapse. When mine gets close, I take them out of the oven and put them on top of the stove so that the oven can preheat.
When fully risen, bake at 350 for 20-25 minutes or until golden brown on the top. When you pull them out of the pans, the sides should be slightly golden brown too. If they are pale, they need to be baked few minutes more.
Immediately take them out of the pans and place on a cooling rack. If you don't do this, not only can they become overbaked from the hot pans, but the steam can make the bottoms all soggy.
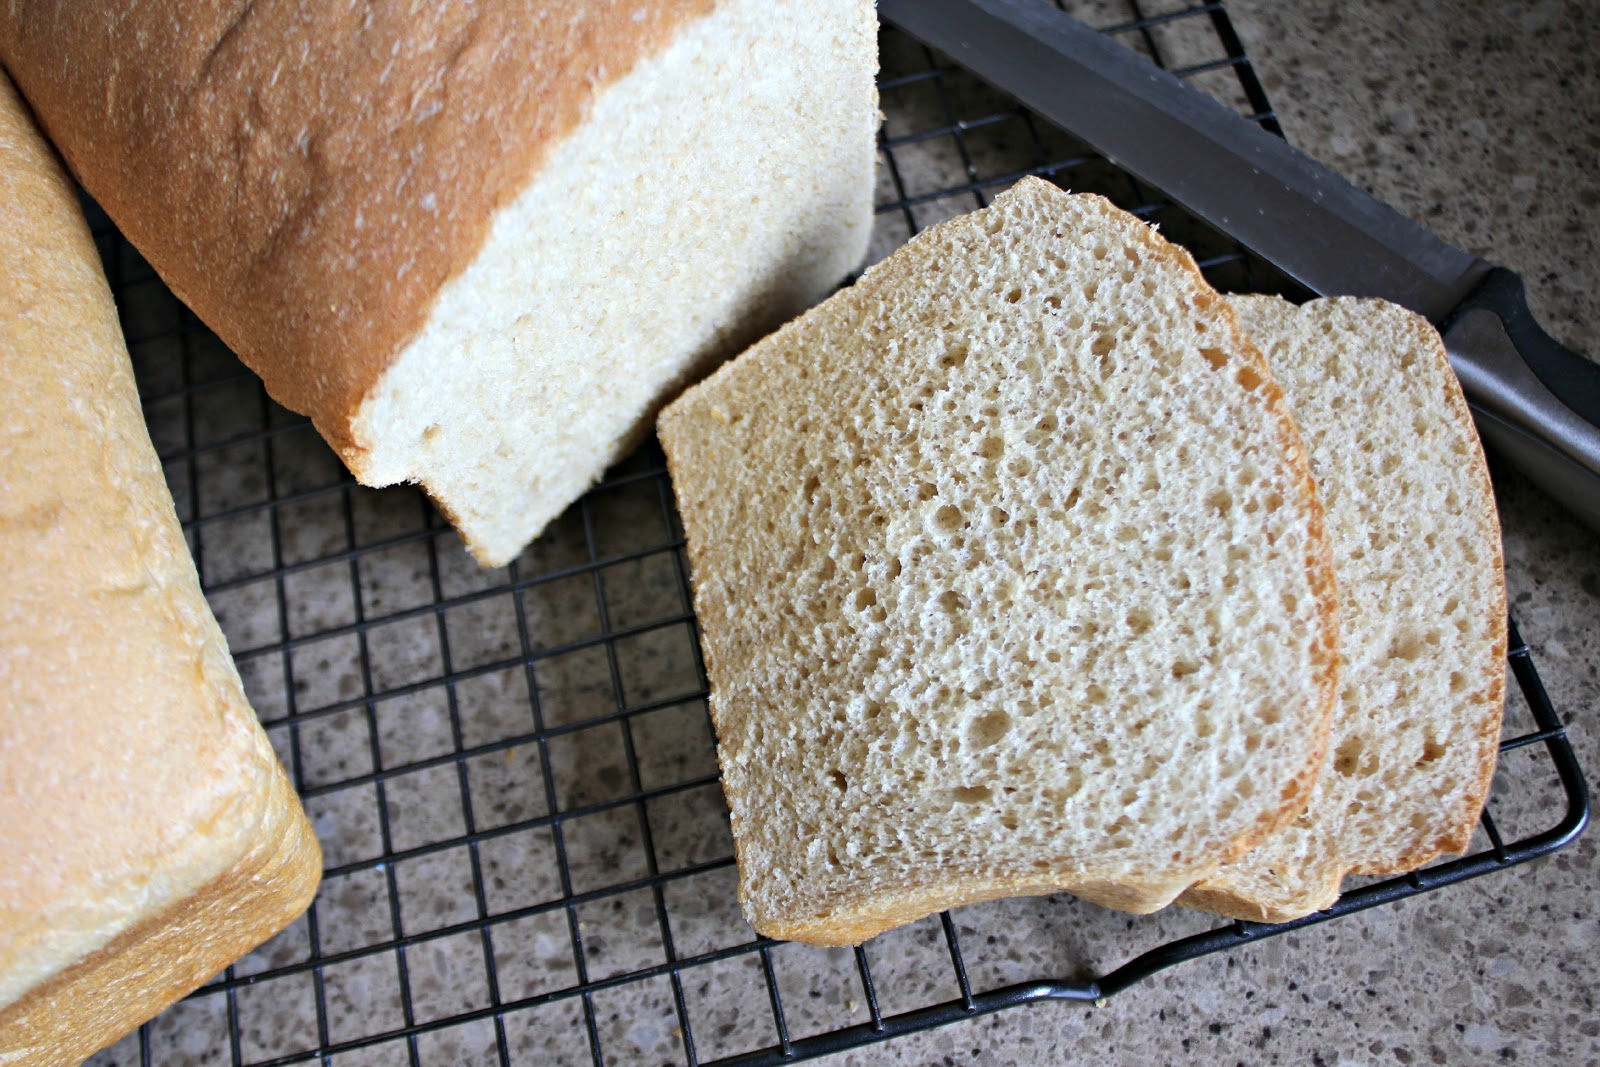
They smell so good, that it is tempting to cut into them right away, but in order to retain the most moisture and not have them dry out, it is better to wait for them to cool before slicing. Use a good serrated bread knife and cut them while on its side rather than from the top for best results. The end result is soft, moist, fluffly whole wheat bread that tastes soooo good. Store it inside a bread bag to keep it from drying out, but be sure it is fully cooled first to keep moisture from forming on the inside of the bag and making your bread soggy.
Because it has no preservatives, homemade bread will mold faster than store bought bread so be sure to either eat it within a few days or just store it in your fridge. I've kept loaves fresh for 2 weeks or more by keeping them in a plastic bread bag in the fridge.
The original recipe calls for 2 rises, first in a bowl and then in a pan, but most of the time I just skip that first rise and it always turns out just fine.
Homemade Whole
Wheat Bread
2 1/4 cups HOT water
1/3 C oil
1/3 C honey
1 t salt
1/3 C gluten flour (if bread is crumbly add more)
1 T Yeast (active dry or instant)
about 4-5 C Flour (whole wheat, bread flour or combo) then
more if needed.
Combine water, oil, honey, and salt in mixer, then mix in
gluten. Add yeast, then add flour 1 cup at a time until it pulls away from the
sides. Put lid on and mix/knead on high for 5 minutes. *Butter/oil bowl and your
fingers. (Dough should be sticky and moist) Twist dough around finger in bowl,
then turn upside down in mound. Cover with a towel and put in warm, draft-free
place to double in size (about 20-25 minutes). Punch down, divide in two and
put in two loaf pans. Let rise in pan (about
15-20 minutes). Bake at 350°F for 20-25 minutes.
*You can also skip the first rising and put the dough directly into the loaf pans to rise.
So there you have it. It may seem hard, but it really isn't. Just a warning though, once you start making it, you will not want to buy store bought bread ever again :)